Lovely sunbeam

Lovely sunbeam
Lovely Sunbeam (and Annierose) 88-99-PF

Friday, 24 February 2017

Exhaust pipe update


Manifolds and down tubes done.

It rather a tight squeeze


New hole through chassis


Testing for the silencers


The end result

Friday, 20 January 2017

Exhaust Pipes and manifolds.

Lovely Sunbeam has been dispatched to the exhaust shop for new stainless manifolds and pipes.

It will take about a month.

Once at the shop she failed to start!
The door handle snapped!
And the hand brake sized!

Very embarrassing.

Starter would spin but no spark. Voltmeter showed less than 8V on starting. Eventually decided the Voltage was going so low the Duraspark wouldn't ignite. I hadn't trickle charged the battery since fitting the alternator. :-(

Hopefully it will work when charged.

On the ramp it was found that the steering contacts the Oil filter - so will have to remove or adjust the oil cooler.

The plan is to cut a 3" pipe through the chassis on the right hand side and shrink the battery box by 4".
Maybe I'll be able to find a low profile modern battery shaped like a pancake to fit.

Sunday, 15 January 2017

Alternator wiring and Dynamo control box mod


Wiring in the alternator.

The main 12v cable was wired directly to the start solenoid and hence the battery.

The alternator was lamp feed was spliced to the wire that was on the D contact of the control box.

The original starter solenoid had already been adjusted so the 12V input was also directly connected to the pre-engage starter. So all the fat 12V cables are now on the same terminal.

The original solenoid is now used as an extra low current switch only to switch the pre-engage starter solenoid. To save on wiring mods. The manual solenoid button is useful.


The Dynamo regulator box was modified (dismantled) and the plan is to use it as a fuse box with two fuses using the F and D terminals as output links And also a mega fuse for the alternator.

A and A1 were soldered together inside to provide a link.


Alternator didn't work when the engine was started.


A Voltmeter was installed on the dashboard on the right hand
Ammeter position. This showed no voltage change when the engine was running and the warning light stayed on.

I had fitted a new alternator regulator about a year ago.
I removed the regulator and inspected the brushes, they were undamaged. The commutator also looked clean. But there are two finger contacts in the alternator that connect to the regulator by spring contact. I bent these outwards a little more and ensured they contacted the module in the correct place.

The next time the engine was started the warning light went out and the Voltmeter registered a steady 15V.

Success .

After a winter of problem starting I added a new starter cable direct from the battery to the starter motor. So the ignition and starter solenoid are now on a different circuit so not affected by any voltage drop along the main starter cable.


Wednesday, 4 January 2017

Throttle cable to Weber 38DGMS

 The old linkage was removed and modified as shown.

Thios gives about 45mm cable movement which is about right.

And a single cable uses the existing bolt hole.

Seems to work ok

 The Weber cable mount kit needs a little mod as it hold the cable offset - maybe I fitted it wrong. Will try reverse the control arm

The left hand gearlever from eBay has a more backward angle.
I could have bent the old but this was cheap enough and then I have a spare!

Another thing to do is to "quicken" the lever action as per this site HERE

Sunday, 1 January 2017

V6 More instrumentation


I'm trying to keep the instruments looking the same.
I suspect the fuel gauge is wrong type.

The Speedometer will have to wait until properly mobile. A new cable will be made and then the speedo will probably need calibrating.

The choke cable was modified to take a new cable and outer cover but keep the original faded knob and mounting.

The cigar lighter needs new or cleaned internals.

The Jaeger Clock has already been modified by the previous owner to take a modern movement. It made the positive to negative earth conversion simple as it is in a plastic isolated body.

There is a lot of work behind the dash board to sort out the birds nest. But its mostly working as is. The Hazard warning indicators still work.

The horns have an added relay behind the dash, one of the horns isn't working.


The water temperature gauge sender doesn't fit in the Granada housing and the Capri sender guage is the wrong type.

The original sender (on the left - with minor repair) is roughly 1000 Ohms at 18 degrees C (room temp) and 130 Ohms at 90- ish degrees C (boiling water from kettle in cup - I don't have a suitable thermometer).

The Capri unit (on the right) is 1/8 NPT but still not the right size for the Granada manifold which has a spare M10 x 1.5 port.


I couldn't find any data on most of the gauge senders available for sale on most sites but Holden and Merlin Motorsport had Smiths compatible senders available in 1/8 NPT.
On receipt the measured resistance readings were close to the original. The instruments don't seem to have external calibration pots

I was able to re-cut the 1/8NPT to M10 and it fits nicely with some thread lock/sealer.

The Mechanical Tacho conversion to electronic is working well, except I have a zero offset issue so I need to open it up again.

Ammeter only for show - it had a vacuum gauge before but I plan on fitting a Voltmeter if I can find a Jaeger or smiths one (at a reasonable price).

Oil pressure connection was a bit hard to find.

The original Capri had an M10 convex connection which was hard to find so in the end I went for a new pipe and adapter from MLR.

Manual pump washer - may be modified to activate a switch for electric pump.

Engine mount also visible here.


Friday, 30 December 2016

Heater plumbed in, radiator halfway there.

The New heater element was fitted a while ago, now it is plumbed in to the Cologne ready for water.
The heater valve is fitted under the alternator and is also used to change the hose diameter from 19mm out of the thermostat housing to 15mm used in the rest of the circuit.

Heater fan needs to be wired into circuit.

Radiator fitted - top hose is the standard Granada item shortened a little.

Bottom hose is from a standard Capri.
The thermostat housing outlet points forward and the radiator inlet (outlet?) is also pointing forwards inline.
The Capri hose is reversed and the last bend is cut and rotated 90 degrees. It seems to work.


Except I have a big leak out of the thermostat area.
It all has to come off again.


And the brake pipe needs to be secured.


Radiator alternator and thermostat all removed, extra clip added to brake pipe.
Seems the leak was most likely just a not tight enough hose clip. but the thermostat needed fitting correctly anyway. Thermostat first then rubber ring.


Thursday, 22 December 2016

positive to negative earth conversion

The engine and gearbox is bolted in its final place.


To attempt to start it I needed to convert to negative earth for the starter motor and alternator.
Just turning the battery 180 degrees was almost all that was required. (and changing the battery connnectors).
This page about positive to negative conversion gives more details and ideas on how to connect an alternator  via the regulator box.


When The wiring is finished I will connect the Alternator output direct to the starter motor positive feed which is direct from the battery. I moved the main starter feed at the old solenoid so the original output was now combined with the battery feed. The solenoid output then is only a small wire to feed the V6 starter solenoid.


The Huco sucking fuel pump was fitted in the engine bay and connected to 12v.

The Capri wiring loom loosely placed in situ and the engine was test started.
It was pleasantly loud with no exhaust and proved the circuits are all correct.

The clutch pedal was tried and seems to not be working. The lever moves about 10mm. Will need to adjust and test again.

Later I realised the clock wasn't working and the extra electric fan was spinning the wrong way.
The clock had been modified by a previous owner so the wires were swapped and its all ok now.
The fan will have the wires swapped also later.

Next plan... fit radiator and fill with water.. check clutch

Merry Christmas

Post Christmas update - Capri wiring loom now modified and connected through the bulkhead. The Duraspark unit is in the Passenger foot-well along with a new 4 way fuse unit. This fuse unit currently supplies 12v to the ignition and the tacho. Later it may supply power to any other new ancillaries...like a Radio or the heater fan.
Clutch checked further - still can't release.


Monday, 12 December 2016

Engine and Gearbox in final position


The engine mounts were welded in place.
In fact I welded the left one, fitted the engine again and then tacked the right one in place to be sure before removing the engine and finishing the weld.

I decided to use the Jose gearbox mount rather than the auto box mount.


I used a Sierra type 9 small vibration mount and modified the Jose mounting to fit.
The Jose mounting was in the right place - just needed a different set of holes.


The modified gear lever is set a bit further forward now.
But as I cant select 1st or 2nd gear I may have to take it all out again!


Also replaced and re routed the front brake pipes.


And installed the Clutch master cylinder and clevis in the final position.

Tuesday, 29 November 2016

type 9 gearbox "shortening"


The engine and gearbox was removed again in preparation for the engine mounts being welded in place. I forgot to remove the gearlever..!


A few measurement were taken, The main measurement for the shortening is 11" from front of tail housing to the front of gear lever casting.


With the gearbox removed from the engine the tail housing was removed.
Beware the layshaft can stick to the housing and pull out with it.. potentially leaving all the cogs and gears rattling around the bottom of the case.. I think I saved it in time.


Now the tail housing is in the ultrasonic cleaner. ready for the hacksaw..!

Sunday, 27 November 2016

Tacho conversion from Mechanical to Electronic


Converting the mechanical Tacho to electronic.
And swapping the bezel so it looks the same as it was.


I used an RVI guage from another machine and added the Spiyda converter.
Set it up for a 6 cyl system using the audio files.

Later I used a signal generator at the office to test the gauge on the main circuit. I added a switch to swap the input lines between the two options the electronic system operates on.

Will it work? When tested later on the car it seemed to be OK but the needle settled at 500 rpm when all powered off.
This was due to the mechanical pointer being balanced so the needle is effectively "weightless" and wont assist the return to zero.

I ground down the tiny brass counter-balance weight and now it falls to zero correctly and still works on the bench and in the car .


Trial fit of propshaft with new type 9 adapter and new bearings all-round.

With everything in the right place - it now looks like I will need to add 1" to the propshaft length for a final solution.

Sunday, 6 November 2016

Engine swap -finalising position.


The old gearbox was an Borg Warner 35 automatic, The original was a standard manual with overdrive so I had both sets of gearbox mounts to potentially use.

Remarkably the Auto box mount fitted just right and only needs the addition of a M12 hole and a small reinforcement.


The gear lever protrudes directly through the ashtray! But it does feel as if its in the right place when sat in the seat.

The plan was to shorten the linkage as per this series of photos.


This being a Right hand drive Alpine and a cologne two port head - the passenger side rear outlet is very close to the steering linkage. The exhaust stud was fowling on the grease nipple.

Some adjustments have been made to the position and it will be possible to fit a bespoke set of headers in there now.

But the linkage will need protection from heat.


Checking the Radiator alignment.

Top hose port is good and will use a standard Granada hose (shortened)

The bottom hose outlet needs to be readjusted.

Thursday, 3 November 2016

Engine swap (part two)


Busy few days.

The engine mounts were cut out.
Nice to see some of the original colour. It will return to that colour one day.
Steering bar replaced. Awkward to fit.
 Trial hanging of the engine.

Will the engine go in with gearbox as well?

Annie wont be impressed with the state of the carpet!

Lots of things get in the way.
A few extra dents and chipped paint.

The oil filter was still on in this pic.. it gets in the way.
The remote filter will be fitted shortly.


Ready for takeoff captain...

Its not in the right place yet but it doesn't look so big now it's in.

I need to cut the transmission tunnel at the gear lever end to be able to push the engine back further.

Then the mounting position can be finalised.

And then pull out the engine again.. :-(

Thursday, 27 October 2016

Engine removal - the change begins.


Engine swap part 1 (of many)


Sad to decommission the sunbeam but it's time to remove the old engine.

Deadline to have it all on the road again is June 2017.
But hopefully earlier.

We are going to the Laon Classic June 3rd in France.

No pressure yet.. (But many overseas jobs on the horizon)


It took all after noon to get the engine out.
Maybe not the best idea to leave the gearbox behind.
But the auto box looks big and heavy.

Not very much space in the engine bay to get at most of the bolts. And of course I forgot one so the engine would only move so far before it got stuck.

Had to take the water pump off as well to move it forward enough.


BW Auto gearbox next to come out.


Engine bay doesn't look to be big enough!

Sunday, 23 October 2016

Adding a heater to the Alpine

Its still sunny so I'm reluctant to take the Sunbeam off the road and remove the engine at the moment so I thought I would trial fit the heater and fan.

It's quite hard to believe that a UK spec car didn't have a heater fitted as standard.

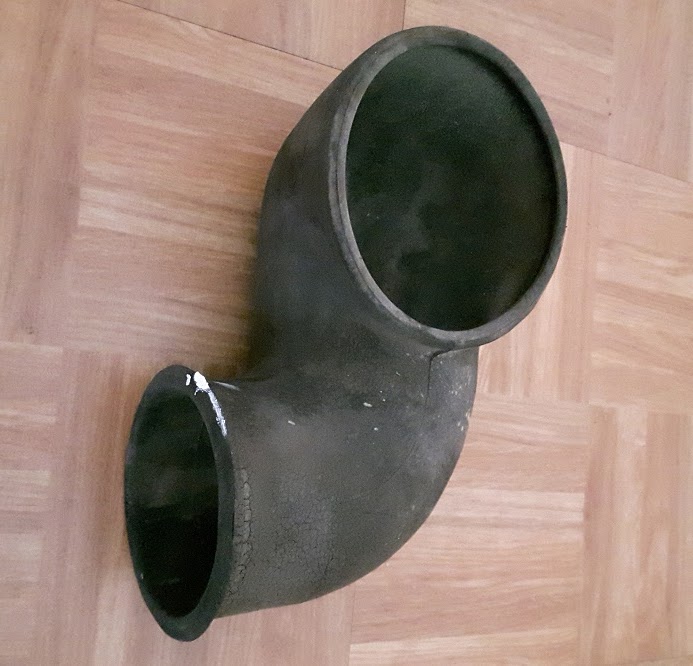
This rubber tube was fitted in lieu of the fan.


It took me some time to realise where the heater should go and how to access it.

Underneath the bonnet catch.
I've now fitted the heater element.


With all the wires and mods under the dash over the years it was a bit awkward to squeeze in the fan unit complete.

I had to disassemble the bracket and remove the motor from the snail housing and fit each item in turn.


I should have cleaned up the bracket first.
This was supposed to be a temporary trial fit but it might stay.. except I now need to source or make the last bit of hose to join the fan to the ducting.

And connect the electrics.

And the hoses to the screen demisters


And a nice time to test the engine again... yayyy it still runs...