Lovely sunbeam

Lovely sunbeam
Lovely Sunbeam (and Annierose) 88-99-PF
Showing posts with label sunbeam. Show all posts

Sunday, 18 June 2023

Servo failure

 It seems my servo is holding on the brakes.

Overheating so much I rolled into park foche Laon with only a hand brake.
After a bit of cooling it was fine for the rest of the day.
Sticking on again at the farmhouse and unlocked when I turned off the engine.
I removed the vacuum hose and blocked it with a tyre valve.

Similar to previous post.. do I need a servo.
Well, with current braking power, yes I do. Quite a struggle to stop.
I have a girling 7/8" master cylinder. Do the none servo cars use a bigger bore?

I'll try the air valve fix first from the archive.
But also, is there a repair kit for the lockheed type 6, 4257 729 29?

Considering I always thought the brakes were a bit hard - so assumed the servo was dud anyway - now it is dud a proper emergency stop would probably break the seats by pushing so hard. So - in my case -  need to fix it.
Of course there may be more wrong than just the servo.

My master cylinder is 7/8" - series I & II had 11/16". So I think to run without servo one ought to use a different master.

This weekend I'll clean and polish the air valve and give it a test run vacuum on.
And a fluid bleed.


I've looked under the air valve and the air valve piston seal is well worn.
So for now I've ordered enough to service what can be accessed easily from northwestclassic.

The proper full service/seal change will be done in the winter.

my servo part number is 4257-729, apparently superseded by 4257-792.

see here for servo operation http://www.mgb-stuff.org.uk/servo.htm


on the last run the brakes stuck on again, so I missed a day trip to the National.
Weather is a bit  :(  so pulled it all apart.


The brakes release when the engine is stopped but I'm changing all the seals in both master and servo.
The servo seals looked OK but the master cylinder seals looked life expired.
Also, despite recent bleeding of a pint of fluid, the fluid in the master still looked contaminated.

Will see soon enough. (I had some yellow that needs using up. No-one will notice)


Got it all together after the master cylinder and servo rebuild -a while ago.
Drove out of the garage and the symptoms were the same. - Brakes stayed on and would release with engine off or very low idle.

After some more looking at the drawings and how it works - In desperation (the only thing still- old) rotated the rubber hose that joins the front portion to the airvalve. It then seemed to work well enough to go to Capel car show.

I replaced the rubber hose with new and now it is working as expected - for two good runs at least.

maybe that was it.

My current theory on the hose is that it had hardened to the profile of the air valve and pipe.
So wasn't blocked but leaking. So not enough power to push the air valve back down. (Could be wrong theory)
Rotating it assisted the seal.
The pipe was easy to remove. The new one was a bit of a struggle to fit. So is well and trult sealed.

It's still OK.  :P
But I realise now the brake effectiveness is a bit sh t. Even with the servo.

Looking at EBC front and rear next. or Princess 4 pots.


Monday, 4 October 2021

prepare for Laon Historique 2021, Springs


In preparation for the Laon Historique I changed the front spring to gain some height at the front. The "new" springs had gone soft and I was almost running on the bump stops.

I fitted the "long" springs but without the rubber donut and the ride height is just right. and I can add the donut if they go soft.


The Laon classic was well organised.


On the saturday we were given a route to follow so the co-pilots had some work to do.


On the sunday the towns roads are closed and the  cars "parade" around the streets. 
Its not a race - but one keeps up with the guy in front!

starring at time 2:26min


On the way home (in the UK)  the proshaft lost a circlip so we had to stop when the car suddenly started to shake.

Both UJ's seemed a bit damaged - maybe due to lack of greaseing - or too much torque.

Ordered GKN U040 no grease nipple replacements.


The GKN U040 have larger rollers but seem otherwise to be the same.


Fitting is fairly easy. 
Although I had trouble with two circlips at the yoke end.
its a bit tight.


If using a version with grease nipple then the nipple needs to fit in the correct orientation on the propshaft which has an indentation for it.
Shown here.


nn


Sunday, 15 August 2021

Type 9 Gearbox repair and Long first upgrade. SAOC National 2021


At the end of last year the 5th gear stopped working.
- it was as if in neutral.

Initially it turned out to be a simple fix - a broken circlip.


In trying to stop the gearbox leaking I made a small error as described in the type 9 gearbox manual.
Which meant a few rollers escaped on the layshaft.
Which I didnt notice - so a run around the block was sufficient to hear a new whine and then the need to remove the gearbox again.


The gearbox was despatched to Paul at First Motion  for proper repair.


I also chose to go for a "long first" conversion.


I chose the "longest" first gear option of FM275 which kept the other ratios the same.

Once on the road the first gear useage is perfect.
Before - it felt as though as soon as the car was moving it was time to choose second.

Maybe I dont need the Scimitar axle now.

A long run to the SAOC National at Thruxton proved it was better than before. Even fifth was easy to select now 😍


Sunday, 29 December 2019

Spa Classic 2019 and lost wheel


A trip to Spa classic went well along with a fun track lap session.

We went all the way there and almost got home without a mishap.
but a short way from home I felt a vibration starting so slowed down to investigate.


Slowly exiting the motorway I slightly applied the brake and suddenly the rear wheel flew past me into the bushes. Releasing the brake then allowed the drum to detach as well.

Fortunately all was at very slow speeds.


After investigation it seems this wheel hub had shorter studs than all the others!
Long studs are hard to find. and standard ones are definitely not suitable for alloy wheels.
Picture shows (left to right)
standard, "as-fitted", desired length, ebay sourced long stud.


A hub puller was obtained and as the studs are not able to be replaced without removing the hub.

The hub wasn't coming off easily. but eventually it released.
The new studs all fitted ok.

The other side refuses to come off so will need to be removed with halfshaft and taken to a press.


Sunday, 27 January 2019

Tonneau and windscreen


Christmas present to Sunbeam was a Tonneau from Don Hoods.
Winter probably isn't the best time to try to fit the tonneau as it wasn't easy to stretch so it was warmed up in the house every so often.


Nutserts


I used captive nuts (nutserts) and lift the dot fittings with M5 threads.


Tenax fasteners


For the front, once the screen was removed, I added Tenax fasteners to somewhere near the factory location.
This is instead of the air vent screws as is popular when the screen is still in place.

Some original paint exposed for view


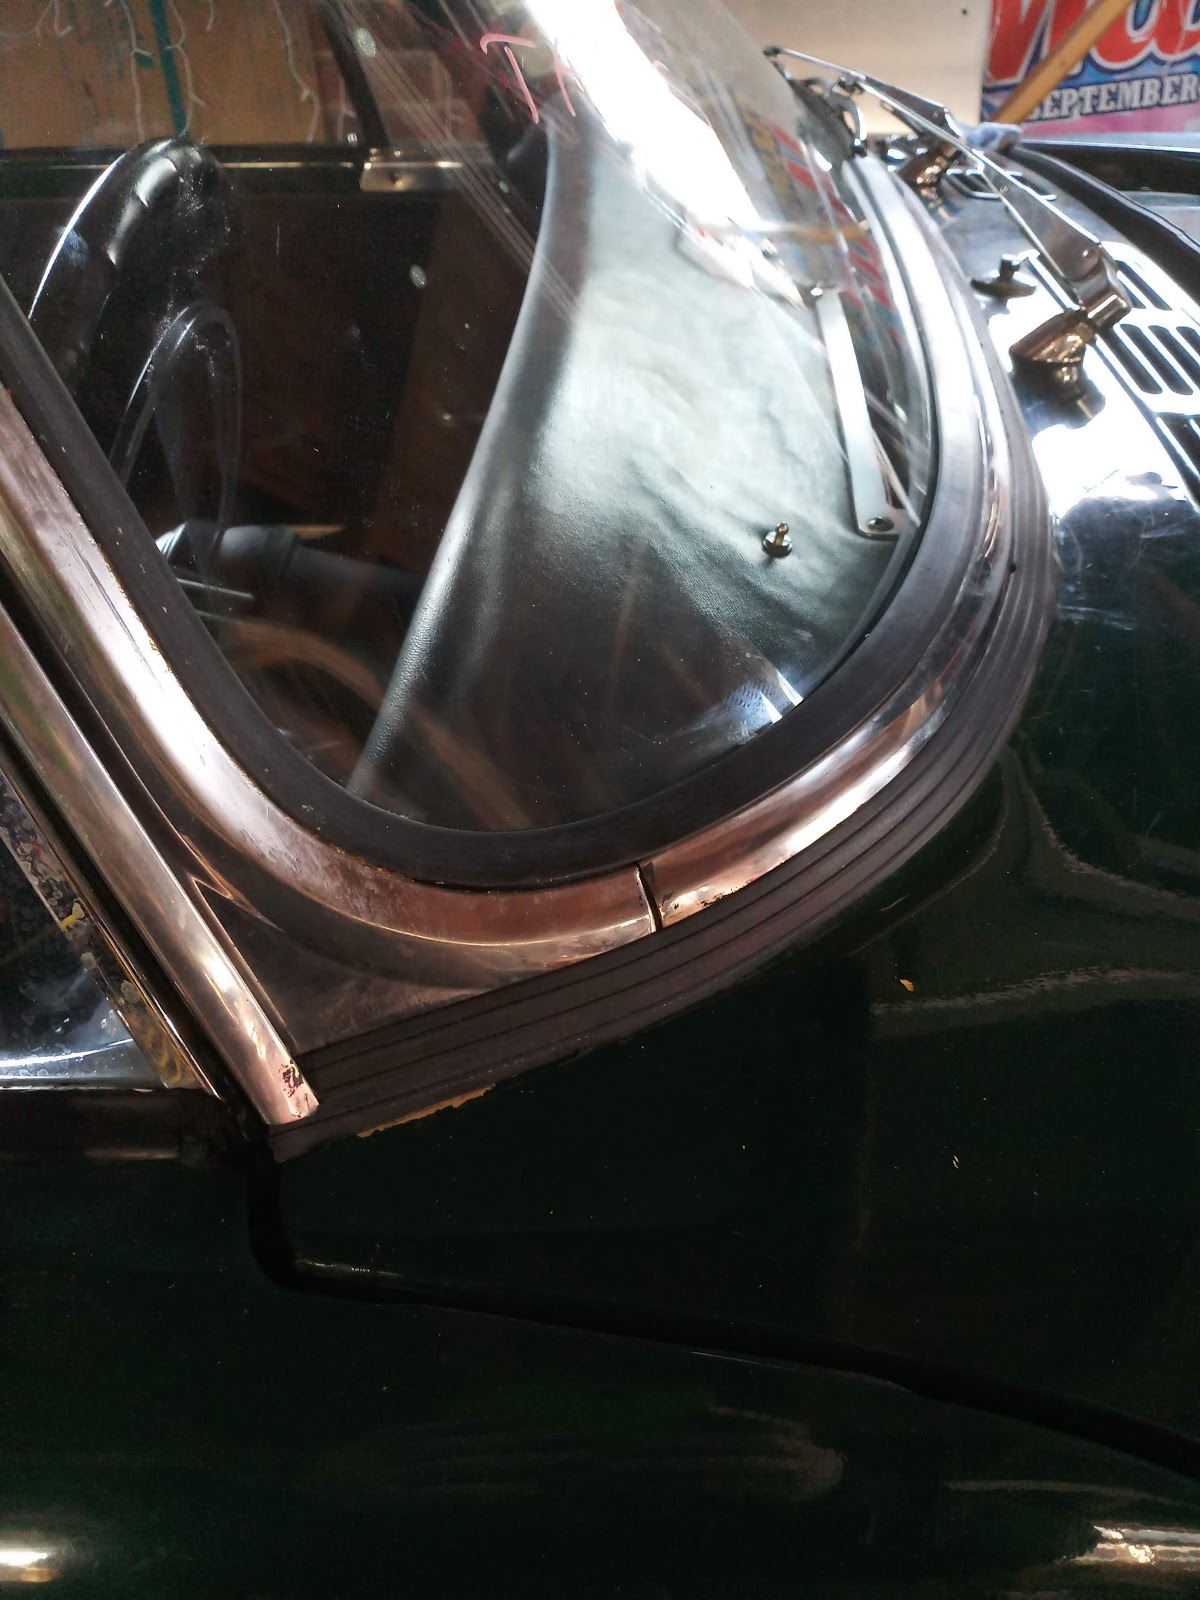
The windscreen is badly scratched and is a nightmare driving at night or into the sun.

The rubbers were showing all of the 55 years.  Despite having been resprayed with screen removed the rubbers were still original.

Cutting the rubber made glass removal easy. but the stainless trim wasn't so easy to remove as it was attached with a strong sealant.


Once the screen was removed the expected rust wasn't as bad as it could have been.


Not the prettiest of repairs but the stainless covers will hide it all.
Any colour so long as it's black...

I don't have the matching paint (Dupli-Color 629686 AC 7-0680) 
and she won't stay Racing Green forever so the bits that are seen will be satin black for now.

I've also left the top-rail front the original light green metallic for future reference.


Fitting the screen wasn't so bad
and the top and side trims were easy. The lower trim was fitted after the frame to body seal had been glued down.

The frame to body rubber trim wasn't so easy.
The rubber trim came with advise to glue the trim to the frame at the back where the cylindrical section is. This worked well.


The original seal had been attached by a sealant filling the entire channel section.Which I also tried to do but the sealant I used wasn't very sticky to rubber.
I followed it up with "serious glue" which did the trick and helped when fitting the frame to body.

Adjustment of the angle wasn't easy and needed some packing on one side.


LED lights


The painted orange indicator bulbs didnt look quite right in the clear lenses so I tried the orange LED indicators from classic car LEDS instead.

I needed to change the lamp holders - as the side lights are in the headlamp now and the lamp holders are offset pin dual filament. -

I've since found the supplier does a white side light and an orange flasher in LED - so I'll be changing it back soon!

The indicators are the same brightness and colour. The only obvious difference is the LEDS are instant ON/OFF compared to a more fade ON/OFF with incandescent lamps.


Hazard style

To get the indicators to work one needs to change the flasher. The type needed has to have an output for the single warning lamp. The only mod needed was to attach the required earth lead.


Then the Hazard warning (Lucas SFB300)  lamps were doing strange things so that relay also needed changing.


I got the bug - so I also changed the side light bulbs to Hi bright LED's and the stop tail lights. The side light lamp is very bright white compared to the original dull yellow.

Number plate lamp to follow soon.

Number plate lamp fitted OK - just ensure its the right way around else it wont work.

I have changed the side lights and indicators now so the lower side/indicators are used as original using an offset pin dual side(white)/indicator(amber) LED.
The lamps are peculiar in that when side lights are on and indicators are selected the associated side light turns off until the indicator is cancelled.


Saturday, 4 August 2018

Le Mans Classic and MOT time

The run to Le Mans Classic was another good test.

Prior to the run some preparation was carried out
Exhaust rattles were fixed.
The gearbox needed a lot of oil.
As did the diff.
Hand brake adjustment.

One side seems to be smoking on overrun and on the outward bound trip I lost some a fair amount of oil - but on the return no loss..!

Performance was good but 20mpg may be a bit low.

The only snag - speedo stopped working.


After the run it was MOT time. Passed.

MOT is still required  due to the engine change.
But as there is some likely sill welding needed soon its a good thing to check.

And confirm the brakes are ok.


Friday, 11 August 2017

New Old scimitar axle, New wheels, Rolling Road


In preparation of possible axle problems (it leaks already and makes a noise) I bought a Scimitar Se5a rear axle ready to modify.

Hopefully this post HERE will provide all the knowledge to make it work.


In the meantime a new set of tyres was need so a new set of
wheels was also purchased. Much nicer looking.

The front end is still a bit high so I have ordered some new springs  made to measure to the correct size for a series 3.


A trip to the rolling road at CCK Historic for the carburettors to be set up was a successful journey.

The standard carb settings were running a bit weak.

The test run then showed 120 bhp and 160 ft lbs torque.

Not bad.


New Springs arrived from coil springs (1989) Ltd
The picture shows that the ones originally supplied were the same length as the proper size springs plus the rubber shock absorber


End result is the front is now 1" lower and therefore matches the back with 25" from ground level to wheel arch

Saturday, 29 July 2017

Fan problems


Sunbeam is running quite well.

I thought one fan-belt has started to wear through where it was rubbing on a thermostat screw. The belt was getting thinner and rubber dust was accumulating in the area.
The screw was been adjusted and it should be ok now.

The fan was a bit noisy as it is running full blast all the time instead of using the viscous coupling. The fan has 8 blades - I think a few less blades and a better electric fan as a backup may be required.

update - A fan-belt shredded yesterday and the other is quite thin. It may be that the fan is causing too much drag so that the cooling pulley is slipping and wearing out the belts. Two blades were removed.

The SPA section fan-belt was replaced by a muscle belt SPZ1120.
On the next run there was no more apparent wear. And the fan noise was quieter.
On the way back one fan blade mangled itself into the radiator. To get home this and its opposite blade was also cut off.

Water Temperature was still maintained at normal - so 4 blades is enough with the electric fan as manual backup. The plan will be to install a more suitable automatic electric fan and fit a twin blade fan just to keep the air under the bonnet moving.


Next time the radiator is removed I will tidy up  the cut edges.


On the next run the clutch started make "ticking" noises -so the engine was removed and a new clutch fitted

So while the engine was out the fan blade was trimmed neatly and the chassis rail was dented for the left side exhaust pipe.


After another fan blade failure - at low speed over bumpy ground - it was decided to remove the fan entirely and fit a pair of pusher fans.

The engine must be a little too close to the radiator.

I had fitted an electric backup fan but wasn't convinced it would be totally suitable. So two 9" fans were selected.

The assembly just fits in front of the radiator.
I used a two stage switch to control each fan.
one comes on at 88ºC the other at 97ºC.

it seems to work....

Thursday, 6 April 2017

Rear Springs

 Rear springs have been changed.
Much improved ride height.


Won't be ready for Spa
But the ride height, spring rate and damping will be much safer for the bigger engine.
Engine still a big issue.
Flange main bearing burnt out.
The heat has distorted the main bearing cap and the block bearing seat, A new bearing will not fit!
Either a new block or get this one line bored.

So start again. :-(